How the agent works
The Cloud Agent is installed as a service on Windows, and can be started/stopped/restarted using the service list provided by the operating system (services.msc).
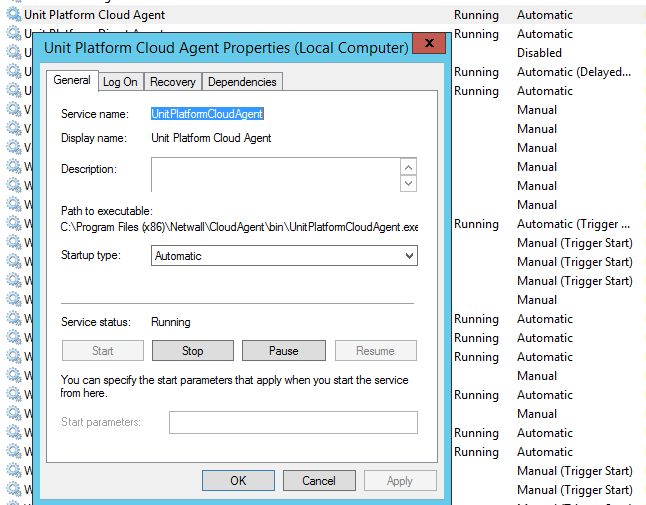
Unit Platform Cloud Agent service
The installation directory is at: C:\Program Files (x86)\Netwall\CloudAgent\. The file var\CloudAgent.log has all log messages generated by the agent. The config\ directory stores all configuration files.
Auto updates
Starting on version 6.0, o Unit Platform Cloud Agent comes with an additional service, responsible for updating the agent’s files. The updates are downloaded directly from Unit Platform.
The update service can be managed using Windows’s service list (services.msc):
Unit Platform Cloud Agent Update Service
The updates are enabled by default. If you don’t want the agent to update automatically, simply stop the service and disable it, so it will not start at boot. Click with the right mouse button on the update service, select properties, and on startup type select disabled:
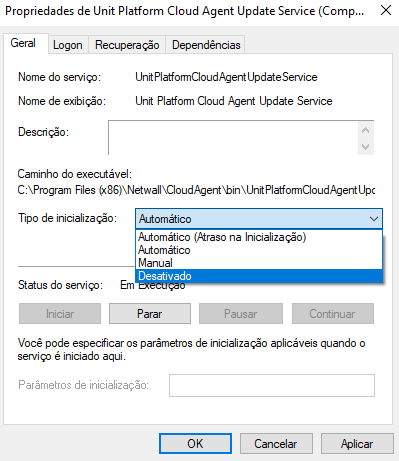
Disabling the updates
Customizing the configuration
The main configuration file is specified at config\agent.conf. In this file you can change the following items:
- Enable/disable sending monitoring information.
- Enable/disable sending inventory information.
- Change the interval on which the agent will send monitoring or inventory information to Unit Platform.
- Change the company key.
- Change the address the agent will send information to. Default: app.unitplatform.io. Change this only if you are using Unit Platform on-premises.
- Configure the data collection timeout value.
- Enable/disable showing more detailed debug messages in the log file.
IMPORTANT: after making any changes in the
agent.conffile, restart the agent service for the changes to take effect.
Monitoring process and services
To monitor processes and services you should edit the config\process.conf and config\services.conf files.
For processes, inform the process names in the file process.conf. The names must be listed one per line in the same way the Task Manager shows in the “Details” tab. See the example below:
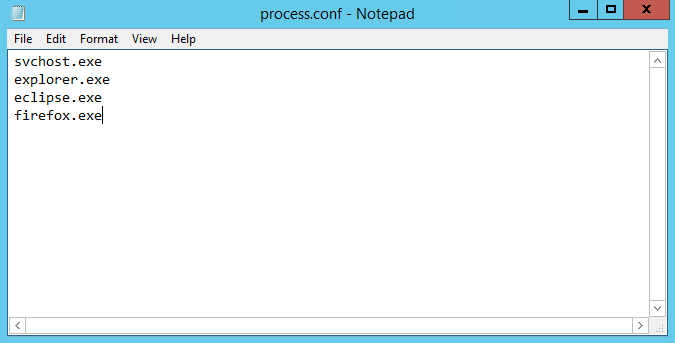
Monitoring Windows processes
To monitor Windows services, edit the services.conf file and inform the process names that should be monitored one per line. To discover the service name, open the service’s properties and look for the field “Service name”:
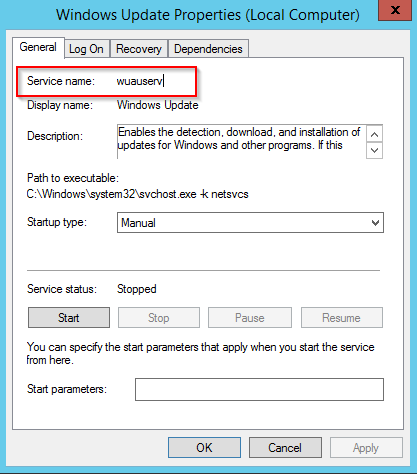
Service properties
Configuration example:
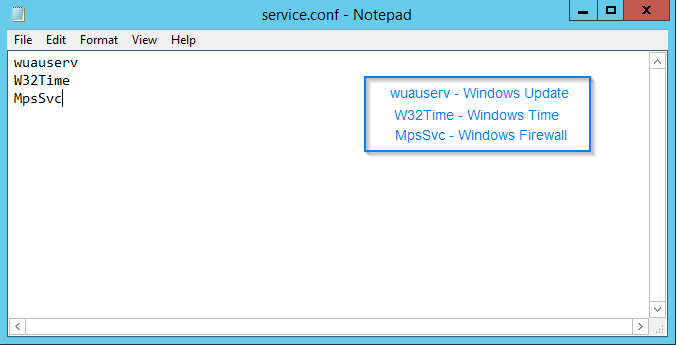
Service monitoring configuration
IMPORTANT: after making any changes in the
process.conforservices.conffiles, restart the agent service for the changes to take effect.
Troubleshooting
These are the most common problems that may prevent the agent from sending information to the Unit Platform:
The device does not have internet access
The device being monitored must have access to the Unit Platform using HTTPS. By default the address the agent will send information to is https://app.unitplatform.io/. Please check if there are any firewall rules denying access to the internet or the Unit Platform.
The agent’s service is not running
The agent’s service is configured to stop in case one of the following situations happen:
- The company key was not informed or is invalid.
- The monitoring/inventory interval is invalid.
If one of these errors occur, there will be messages detailing the errors in the log file (CloudAgent.log). To correct these errors, edit the agent.conf file, and follow the instructions in the comments and restart the agent. As a last resort, uninstall the agent and reinstall it.
The device limit for your plan has been exceeded
In this case, revise your Unit Platform subscription and restart the agent.